Managing access permissions effectively is an important aspect of maintaining a secure and collaborative environment in Amazon Quick. Quick supports versatile user management options designed to accommodate various identity types and organizational needs. You can provision users natively through Quick Identity or manage them through enterprise identity providers such as AWS IAM Identity Center or Active Directory. These systems allow user roles including Admin, Author, and Reader to be assigned and grouped according to job functions and security requirements. As team members join, change roles, or leave the organization, administrators must make sure transitions happen smoothly without disrupting business workflows or creating security gaps.
Regular access reviews are important for maintaining security in your Quick environment. Plan monthly or quarterly audits of user roles to confirm everyone has appropriate permissions. When team members’ responsibilities change, proactively transfer ownership of their dashboards and analyses to prevent orphaned resources. This practice, recommended in the AWS Well-Architected Framework, helps maintain continuity for business-critical visualizations.
In this post, we focus on one specific but important user lifecycle task: downgrading user roles.
Why downgrade?
The principle of least privilege applies strongly to Quick administration. Users should have access only to what they need for their specific job functions. Downgrading user roles is a key part of enforcing least privilege. When a user’s responsibilities no longer require authoring or administrative capabilities, reduce their role accordingly to minimize the security surface area.
Quick pricing is also role-based: Authors and Admins pay a fixed monthly per-user fee, while Readers use session-based pricing. Organizations with users provisioned as Authors who only consume dashboards can reduce costs substantially by right-sizing them to Reader roles. For current pricing details, see the Amazon Quick pricing page.
For more granular control beyond the built-in roles in Amazon Quick, consider complementing role assignments with Custom Permissions, which restrict specific capabilities within a role tier. The integration of Amazon Quick with AWS Identity and Access Management (IAM) provides additional permission boundaries that complement the basic role system.
Scope of this post
Although the exact steps depend on the user identity type, this post primarily addresses Amazon Quick Identity users (also called Quick-managed users). Users authenticated through IAM Identity Center or Active Directory typically have role changes managed through their external identity provider group mappings. If your environment uses IAM Identity Center, role downgrade is handled by moving the user from one IdC group to another (for example, from a Quick-Admins group to a Quick-Readers group). No step-down sequence is required.
Although the Amazon Quick console doesn’t provide a direct downgrade path for all role transitions (specifically, you cannot downgrade from Admin to Reader or from Author to Reader directly through the console interface), two reliable solutions exist: a manual deletion-and-recreation method, and an approach that uses the AWS Command Line Interface (AWS CLI). We walk you through both techniques to help you maintain proper access management as your team evolves.
Prerequisites
Before we begin, make sure you have an active AWS account with administrator access to Amazon Quick. If you plan to use the CLI method, you need the AWS CLI installed and configured on your machine. It’s also helpful to prepare a list of users whose roles need changing.
Understanding Amazon Quick roles
Amazon Quick offers two subscription tiers with distinct role sets:
| Subscription | Roles | Capabilities |
| Amazon Quick Enterprise | Admin Pro, Author Pro, Reader Pro | Full BI + AI features (agents, topics, Q&A, stories, generative summaries) |
| Amazon Quick Sight (BI-only) | Admin, Author, Reader | Traditional BI authoring and consumption |
The console does not provide a direct way to downgrade from any Author tier to any Reader tier. The update-user API enforces this same constraint, rejecting direct downgrades with a “You cannot downgrade a user role” error.
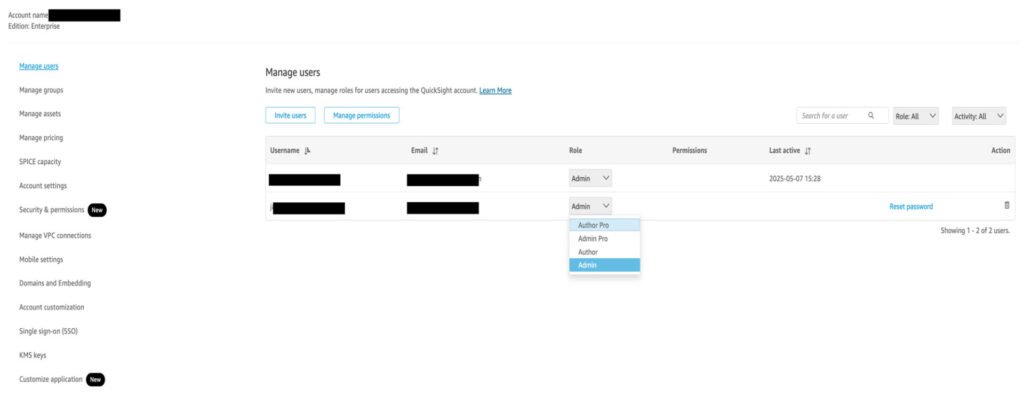
The following screenshot shows the Amazon Quick Suite user management page, where the console offers no direct control to move a user from an Author tier down to a Reader tier. This illustrates why the methods in this post are necessary.
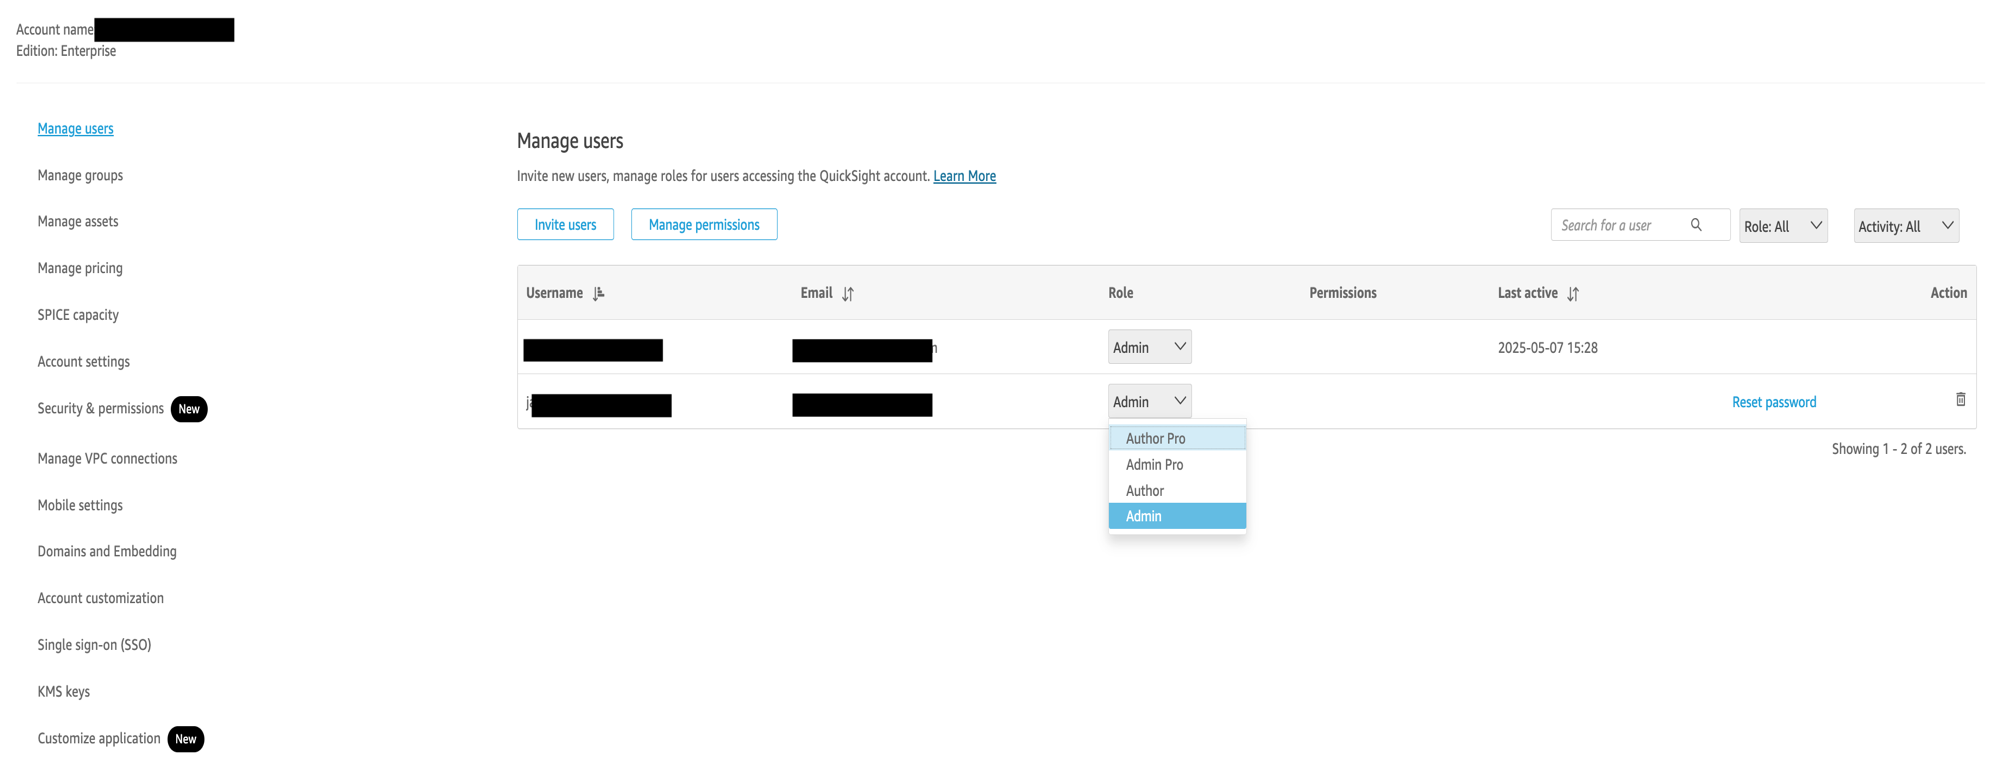
Figure 1: Amazon Quick Suite user management page
The CLI step-down method works reliably for the legacy BI-only roles (Admin, Author, Reader), following this sequence:
Admin > Author > Restricted Reader > Reader
This same sequence also works for Pro users, as long as the intermediate steps use the legacy roles. For example, Author Pro > Author > Restricted Reader > Reader Pro completes successfully.
Important considerations before making changes
When implementing role changes through either method, there are several important factors to keep in mind. First, verify that all users in your list are currently Admin or Author users before making changes. Attempting to downgrade users who already have lower permissions might cause errors. Resource ownership questions still apply even when using the CLI method. Users being downgraded will no longer be able to edit resources they previously owned. For larger organizations using the CLI method, consider loading user email addresses from a CSV file rather than hardcoding them. If you use AWS CloudShell instead of a local CLI installation, you can omit the AWS Region specification because AWS CloudShell automatically uses your current console Region context.
Transferring asset ownership (do this first)
Before deleting a user, it’s essential to make sure that any assets they own, such as dashboards, datasets, and analyses, are properly reassigned. This prevents disruptions and avoids leaving resources orphaned. If the user is an Author, verify whether they own any datasets or dashboards, and follow the same asset reassignment steps described here. There are three main ways to handle asset ownership transfers in Amazon Quick.
Option 1: Proactively transfer ownership to another admin
The most controlled approach is to manually reassign ownership before deleting the user. To do this, go into each asset in Quick, choose Share, and assign another admin as a co-owner. With this method, you can determine exactly who takes over each resource, which is especially useful for high-impact dashboards or datasets. Although this can be time-consuming in large environments, it gives you the flexibility to distribute assets according to your team’s structure and responsibilities.
The following screenshot shows the Share dialog for an asset, where you add another admin as a co-owner so that ownership is transferred before the original user is removed.
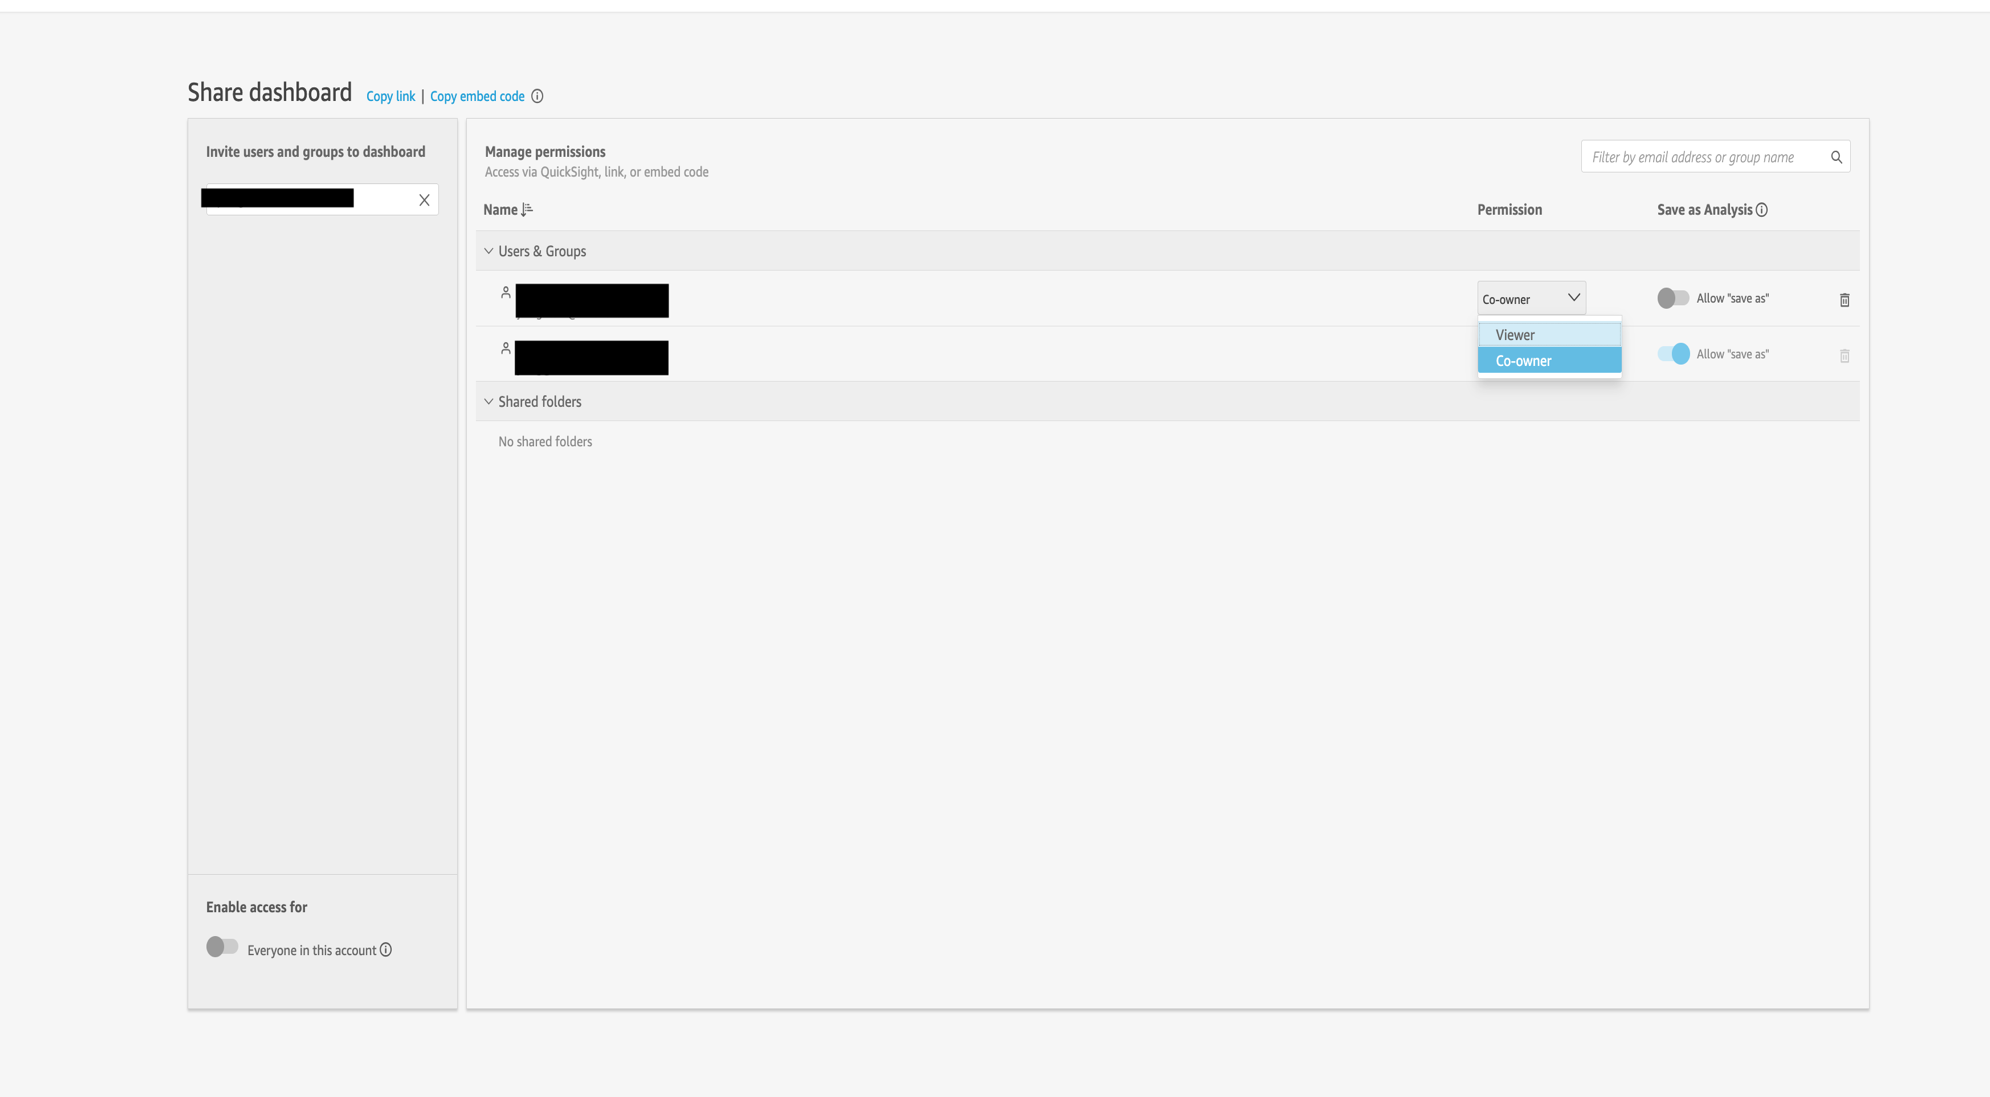
Figure 2: Transferring asset ownership to another user
Option 2: Use the Amazon Quick bulk asset transfer on the Admin page
If the user owns many assets, the manual method can become inefficient. In this case, you can use the Manage assets feature available in the Admin section of Quick. With this tool, administrators can perform bulk ownership transfers or update sharing permissions for multiple assets at once. It streamlines the reassignment process significantly, particularly when offboarding users or managing organizational changes. For more details on how to use this feature, see the official Managing assets in Amazon Quick documentation.
Option 3: Share assets with a Quick user group
Another effective strategy is to share assets with a user group. For Quick Identity users, you can create a Quick group, add relevant team members, and share dashboards or datasets with the group rather than individual users. If your account is integrated with IAM Identity Center or Active Directory, equivalent groups are created and managed in those systems, and Quick uses those external groups for access control instead of Quick-managed groups. This way, access to shared resources remains intact even if a specific user is deleted. It’s a resilient approach that reduces the need for reassigning ownership in the future and helps maintain consistent access across dynamic teams.
Manual method: Deleting and recreating the user
Although not the most efficient approach, the manual deletion and recreation method is one option for environments where CLI usage isn’t feasible. This method involves removing the admin user entirely and then recreating them with reader permissions. This same manual method also applies when downgrading an Author to a Reader, though typically with fewer complications around asset ownership.
Because this method requires deleting the user account before recreating it with a lower role, careful preparation is essential to avoid losing valuable resources and disrupting workflows. Make sure you have completed the asset ownership transfer described in the previous section before proceeding.
Step 1: Delete the admin user
After you transfer ownership of all resources, sign in to the AWS Management Console and navigate to the Amazon Quick service. From there, choose your profile icon, and then choose Manage Quick, followed by Manage users. When you locate the admin user you want to downgrade, choose the delete icon next to their name and confirm the deletion when prompted. This completely removes their current access to the system.
If you haven’t transferred all resources beforehand, Quick presents an ownership transfer dialog. This dialog prompts you to select another admin who will receive ownership of all the user’s resources. Select an appropriate admin from the list, then confirm the transfer by choosing Delete and transfer. This built-in transfer mechanism helps prevent orphaned resources but transfers everything to a single admin. For more granular control, use the proactive approach mentioned earlier to distribute resources strategically among different team members.
If you skipped the proactive transfer, the deletion dialog shown in the following figure lets you reassign all of the user’s resources to a single admin before the account is removed.
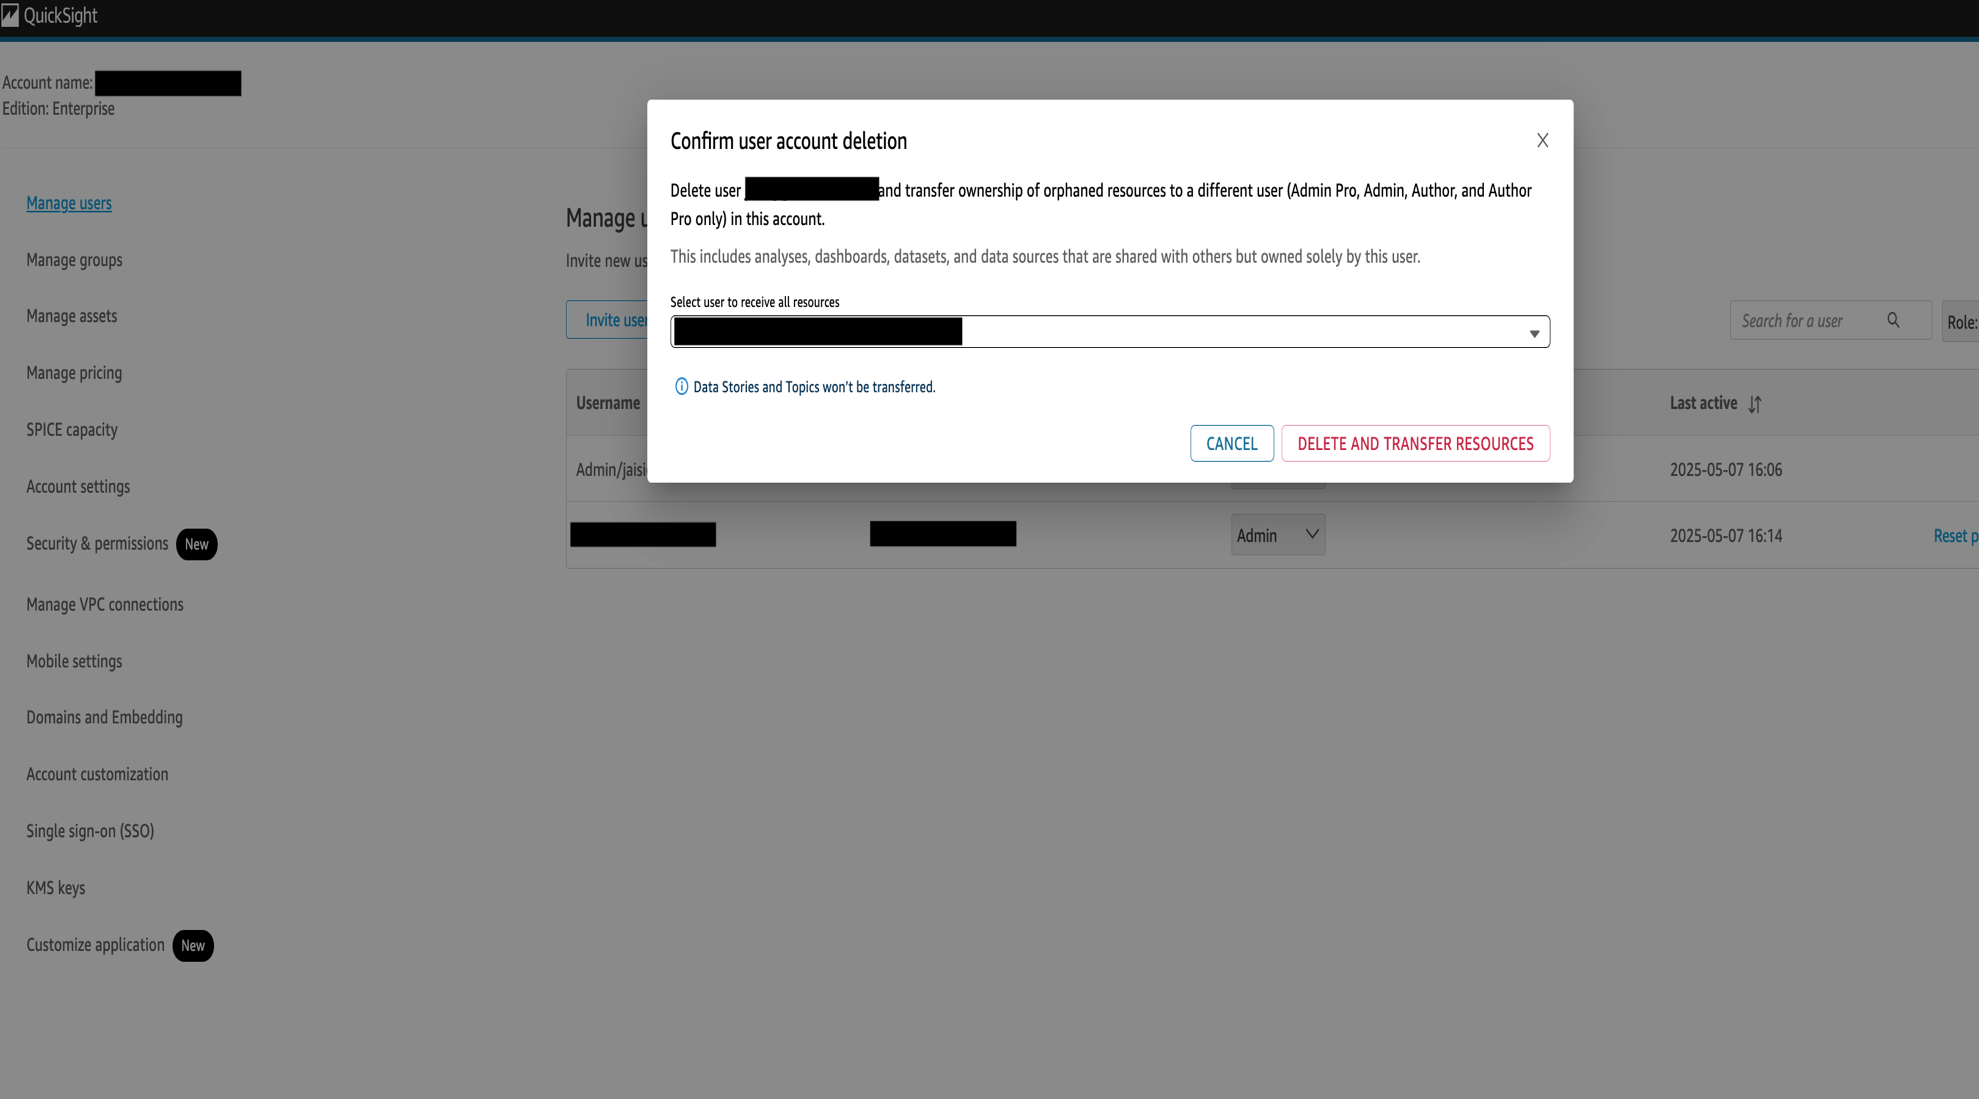
Figure 3: Built-in resource transfer during user deletion
Step 2: Recreate the user with the Reader role
After successfully deleting the user, remain on the Users page and choose Invite users. Enter the user’s email address and select the Reader role from the available options. Send the invitation to allow the user to rejoin Quick with their new, more restricted permissions.
Step 3: Verify the role change
After the user accepts the invitation:
- Confirm that their permissions have been updated to Reader.
- Verify that they can only view dashboards and reports.
- Confirm that they can’t modify or create content.
CLI method: Step-down role transition (recommended)
If you prefer to use the AWS CLI or AWS CloudShell, you can programmatically change the user’s role. Because Quick requires role changes to be made in a specific sequence, you can’t transition directly from any Admin to any Reader. Instead, you must step through intermediate roles.
Important notes
- Replace
<your-account-id>with your AWS account ID. - Replace
<user-name>with the username of the user. - Replace
<user-email>with the user’s email address. - If you’re using the AWS CLI outside CloudShell, specify the
--regionparameter. - The
--rolevalue must match the API role name exactly (see the preceding table).
Example: Legacy track (Admin to Reader)
Step 1: Change role from Admin to Author:
Step 2: Update role from Author to Restricted Reader:
Step 3: Change role from Restricted Reader to Reader:
After the downgrade: Review Limit Profiles and Custom Permissions
Role changes don’t automatically adjust Limit Profiles or Custom Permissions profiles. Both persist independently of the user’s role, and you should review them after any downgrade.
- Limit Profiles control per-user caps on resources such as index storage and agent hours. If the downgraded user was assigned a profile appropriate for their previous Admin or Author role, reassign a Reader-appropriate limit profile to avoid over-allocating resources. See the Limit Profiles documentation for details.
- Custom Permissions restrict specific capabilities within a role tier. A profile assigned to an Author might not behave as expected on a Reader. Either unapply it during the final CLI step (using
--unapply-custom-permissions) or assign a profile designed for the Reader tier.
Script for updating multiple users
Use the following script to update multiple users.
Script functionality
This script performs the following:
- Reads usernames and email addresses from an external file (supports comments with #).
- Updates role in three stages: Admin > Author > Restricted Reader > Reader.
- Error handling stops the transition for a user if any step fails.
- Sleep commands allow time for changes to take effect.
A few things to keep in mind when running the script:
- Confirm users are currently Admin or Author users before running.
- Use the actual Quick username, which might differ from the email prefix in federated environments.
- No Region specification needed in AWS CloudShell.
- You can modify the script to load users from a CSV export of
list-users.
Best practices for user access management
To keep your Quick environment secure and well-organized, follow these best practices:
- Review user roles regularly (monthly or quarterly audits).
- Transfer resource ownership before changing roles.
- Follow the principle of least privilege.
- Use Custom Permissions profiles for fine-grained control within a role tier.
- Share resources with groups rather than individuals for resilience.
- Use AWS Identity and Access Management for additional permission boundaries.
Cleaning up
After completing user role changes:
- Remove any test users.
- Verify that no unintended resources remain.
- Delete temporary CLI scripts or user list files.
- Double-check the final user permissions.
Conclusion
In this post, we explored two methods to downgrade user roles in Amazon Quick: manual deletion and recreation, and a flexible AWS CLI approach. These strategies help you manage team access efficiently and securely.
For environments using IAM Identity Center, role changes are managed through IdC group reassignment, which does not require the step-down sequence described here. For additional governance controls, explore Custom Permissions for feature-level restrictions and Restricted Folders for content-level isolation.
Resources
- Managing User Access in Amazon Quick
- Managing Assets in Amazon Quick
- Custom Permissions Profiles
- AWS IAM Best Practices
- AWS Business Intelligence Blog
We’d love to hear about your user management experiences. How does your organization handle role transitions in Quick Suite? Have you developed custom scripts or processes to streamline these changes? Share your thoughts and challenges in the comments.